Using Set-UnifiedGroup in Powershell

Managing Microsoft 365 Groups effectively is crucial for maintaining streamlined communication and collaboration within any organization. As an IT administrator, you might often find yourself needing to update group settings to match evolving business needs or to ensure security policies are adhered to.
Fortunately, PowerShell offers a powerful tool for this: the Set-UnifiedGroup cmdlet. This cmdlet allows you to modify a wide range of properties for your Microsoft 365 Groups, from changing their email addresses to adjusting membership settings, all with a few lines of code.
In this guide, we’ll walk you through how to use the Set-UnifiedGroup cmdlet effectively so you can have a clear understanding of how to leverage this cmdlet to keep your Microsoft 365 Groups organized and up-to-date.
What is the Set-Unified Group Cmdlet?
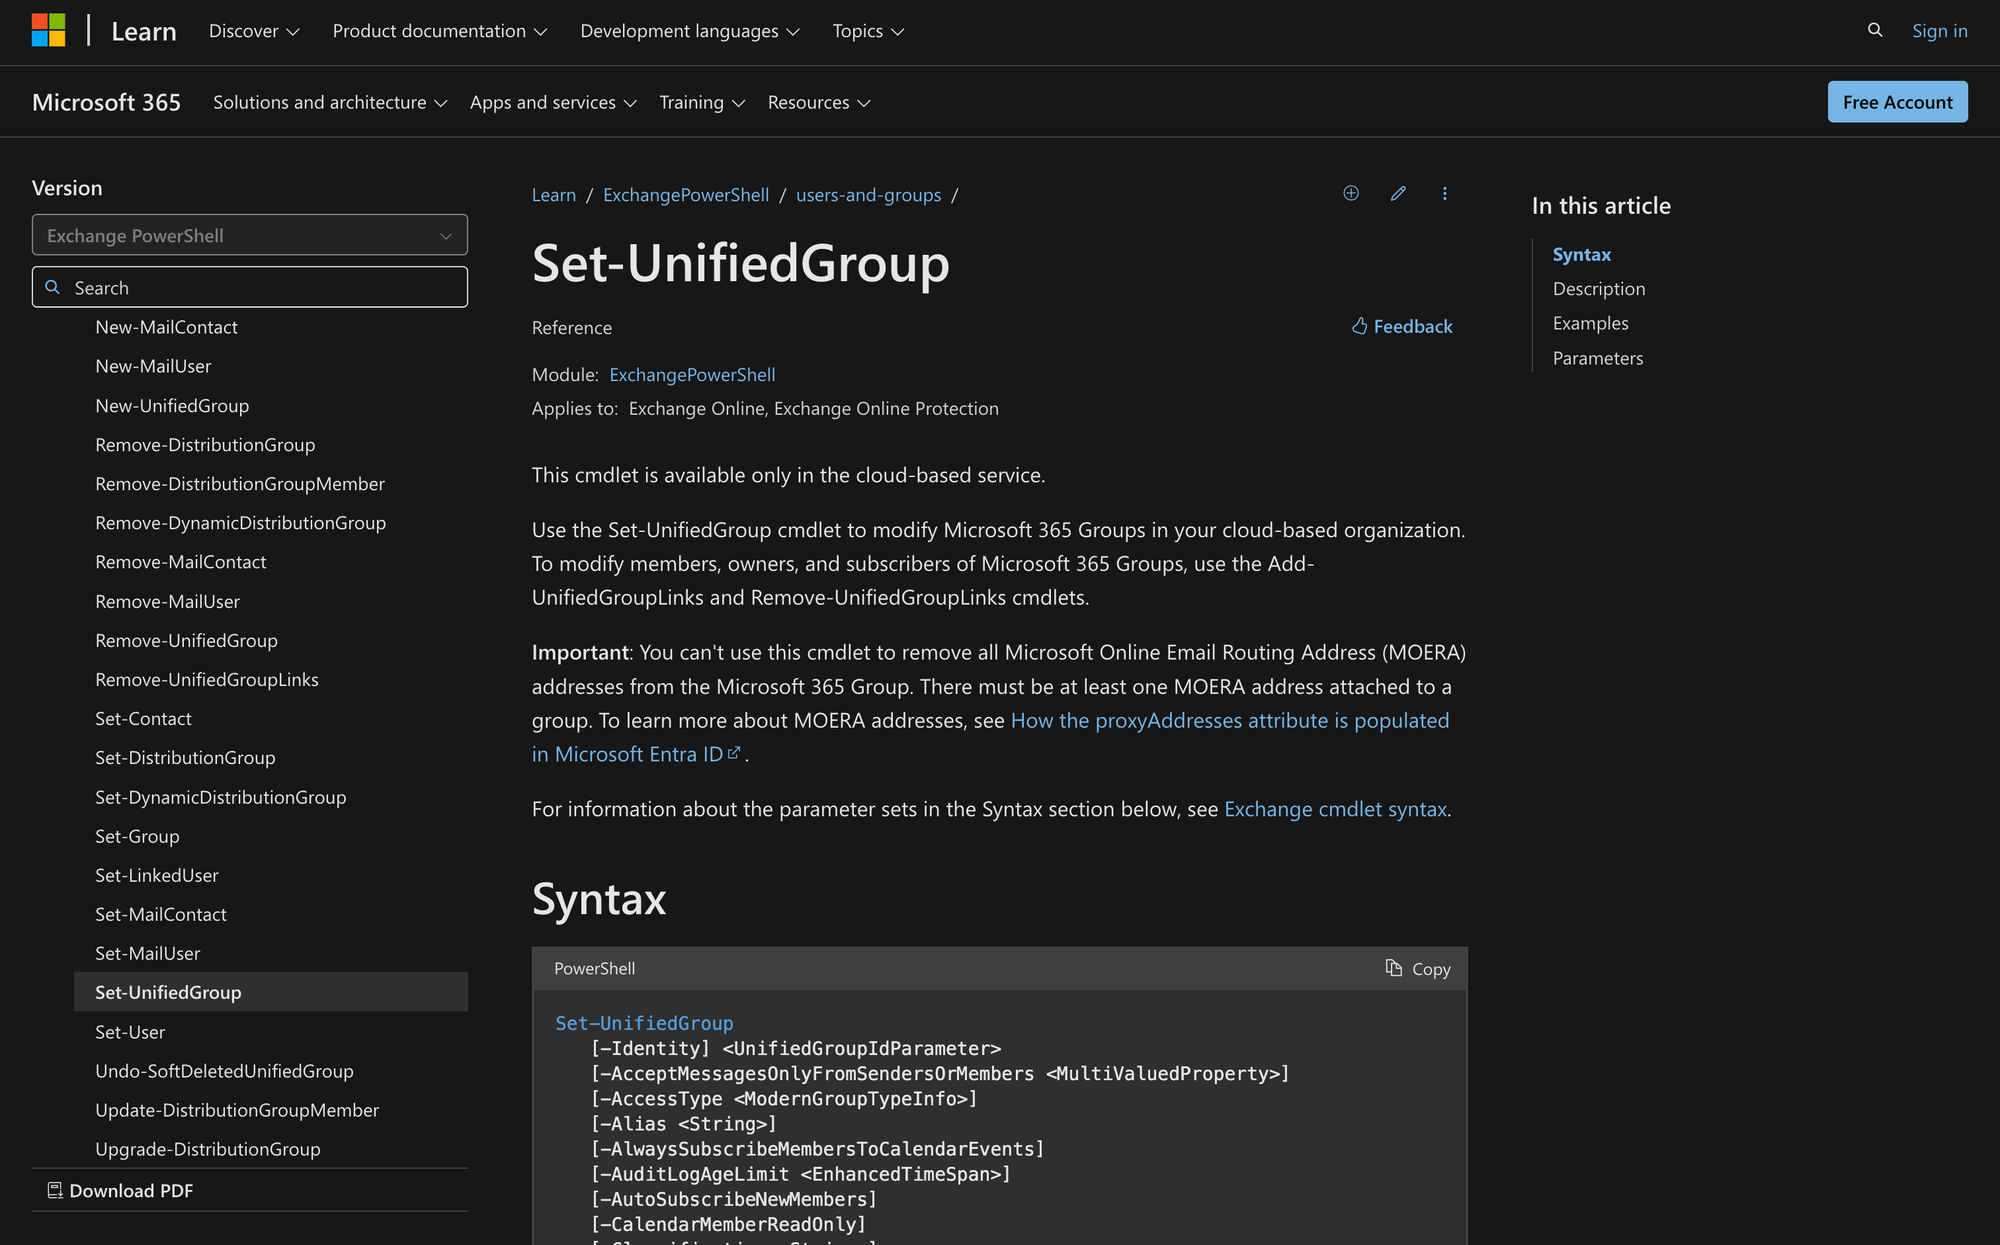
Set-UnifiedGroup in PowerShell is a cmdlet used to modify the properties of an Office 365 Group (also known as a Microsoft 365 Group). This cmdlet allows administrators to update various settings of the group, such as its display name, description, membership settings, and other configurations.
The command is normally used in organizational environments to manage group settings efficiently, ensuring that group configurations adhere to company policies and operational needs. This cmdlet is part of the Exchange Online module, which requires appropriate permissions and roles to execute.
Here’s the syntax of Set-UnifiedGroup in PowerShell. Visit Microsoft’s website if you want to learn more about the meaning of each specific cmdlet parameter:
What Can You Use PowerShell Set-UnifiedGroup Cmdlet For?
The Set-UnifiedGroup cmdlet is mainly used for managing Office 365 Groups, as in the following use cases:
- Updating Group Display Name and Description: When an organization's department undergoes a rebranding or restructuring, the display name and description of the corresponding Office 365 Group may need to be updated. For instance, if a company's "Web Design Team" is rebranded to "Web Marketing Department," administrators can update the group's display name and description to ensure it accurately reflects the new identity and purpose.
- Managing Group Membership Settings: Administrators can control how new members interact with the group. For example, an organization might want to enable automatic subscriptions to group conversations for new members to ensure they are immediately informed about ongoing discussions and updates. So, if the group generates a high volume of emails, the organization might disable automatic subscriptions to prevent overwhelming new members with notifications.
- Configuring Group Policies: The cmdlet allows administrators to enforce specific policies that align with the organization's security and communication protocols. For example, to enhance security, a company might restrict external senders from emailing the group, preventing potential spam or phishing attempts. These policy settings help ensure that the group's operations adhere to organizational standards and regulatory requirements.
3 Prerequisites to Use Set-UnifiedGroup in PowerShell
To run the Set-UnifiedGroup cmdlet, you need to meet the following three prerequisites:
- Permissions: First, you need to be assigned the necessary permissions to execute the cmdlet. This includes specific permissions related to managing Office 365 Groups, which may not be available to all users by default.
- Group Creation Settings: While you can modify many settings of an existing Microsoft 365 Group using this cmdlet, some settings, such as HiddenGroupMembershipEnabled, can only be configured during the creation of a new group and cannot be changed afterward.
- Exchange Online Module: Lastly, you need to have the Exchange Online PowerShell module installed and properly configured in your environment to access and use the Set-UnifiedGroup cmdlet.
How to Use Set-UnifiedGroup in PowerShell in 3 Easy Steps
If you want to efficiently use this PowerShell command, just follow the next three quick steps.
Step 1: Connect to PowerShell and Identify the Group & Parameters
Before starting, remember that you need to connect to Microsoft Exchange PowerShell using this command:
Replace this cmdlet with your own email, complete the authentication procedure, and get started.
First, determine the identity of the Microsoft 365 Group you want to modify.
To identify the name or alias of the Microsoft 365 Group, you can use the Get-UnifiedGroup cmdlet to list all groups and find the exact name or alias.
For instance, if you want to modify the "Web Design" group, ensure that this is the exact name or alias used when referring to the group.
Once you have all the necessary details about the group, such as its current properties and configuration, you can use the Get-UnifiedGroup cmdlet again to retrieve the group’s current settings like this:
Step 2: Specify the Changes
Now, we need to decide on the specific properties you want to change in the group.
Identify which properties need modification - you might want to update the primary email address, change the access type, or modify membership settings.
Remember that you need to be aware of how these changes will impact the group and its members. For example,changing the email address will affect how members and external users send emails to the group. Changing the access type will affect the visibility and accessibility of the group.
Another example: making a group private will restrict access to its content and require approval for new members to join.
Once you know what you want to do, it’s time to run the cmdlet in PowerShell.
Step 3: Run the Set-UnifiedGroup Cmdlet and Verify Changes
Once you have all the parameters ready, execute the Set-UnifiedGroup cmdlet with the information to apply the changes to the identified group.
So, let’s construct the PowerShell command with the necessary parameters. Take a look at the following example:
The Set-UnifiedGroup cmdlet with these parameters changes the primary email address of the "Web Design" Microsoft 365 Group to [email protected] and allows the group to receive emails from unauthenticated (external) senders.
After running the command, verify that the changes have been applied correctly. You can use the Get-UnifiedGroup cmdlet again to check the updated properties of the group.
In this case, use the following command again:
This will work to confirm that the primary email address and sender authentication settings have been updated as expected.
As you see, the Set-UnifiedGroup cmdlet in PowerShell can significantly enhance your ability to manage Microsoft 365 Groups effectively. Whether you need to update email addresses, adjust membership settings, or enforce security policies, this cmdlet provides a streamlined approach to making necessary changes.
You’re now well-equipped to use Set-UnifiedGroup to manage your Microsoft 365 Groups with confidence and precision.