How to use Set-DistributionGroup in Powershell

Managing distribution groups is a key responsibility of IT admins using Microsoft Exchange. These groups make it easier to send emails to multiple people, helping to keep communication smooth within teams or departments.
To get the most out of distribution groups, admins need to be skilled in adjusting their settings and properties to fit the organization’s needs. That’s where the Set-DistributionGroup cmdlet in PowerShell comes in handy.
Whether you need to update a group's name, set rules for membership approval, or control message delivery for better security, we'll show you how to use the Set-DistributionGroup cmdlet in PowerShell in three easy steps.
What is the Set-Distribution Group Command in PowerShell?
Set-DistributionGroup in PowerShell is a cmdlet used in Exchange Server and Exchange Online environments to modify the properties of existing distribution groups, which facilitate sending emails to multiple recipients.
It allows administrators to change various settings such as the group's name, description, membership approval rules, message delivery restrictions, and more. This cmdlet is essential for managing and updating distribution groups to ensure they meet organizational needs and policies.
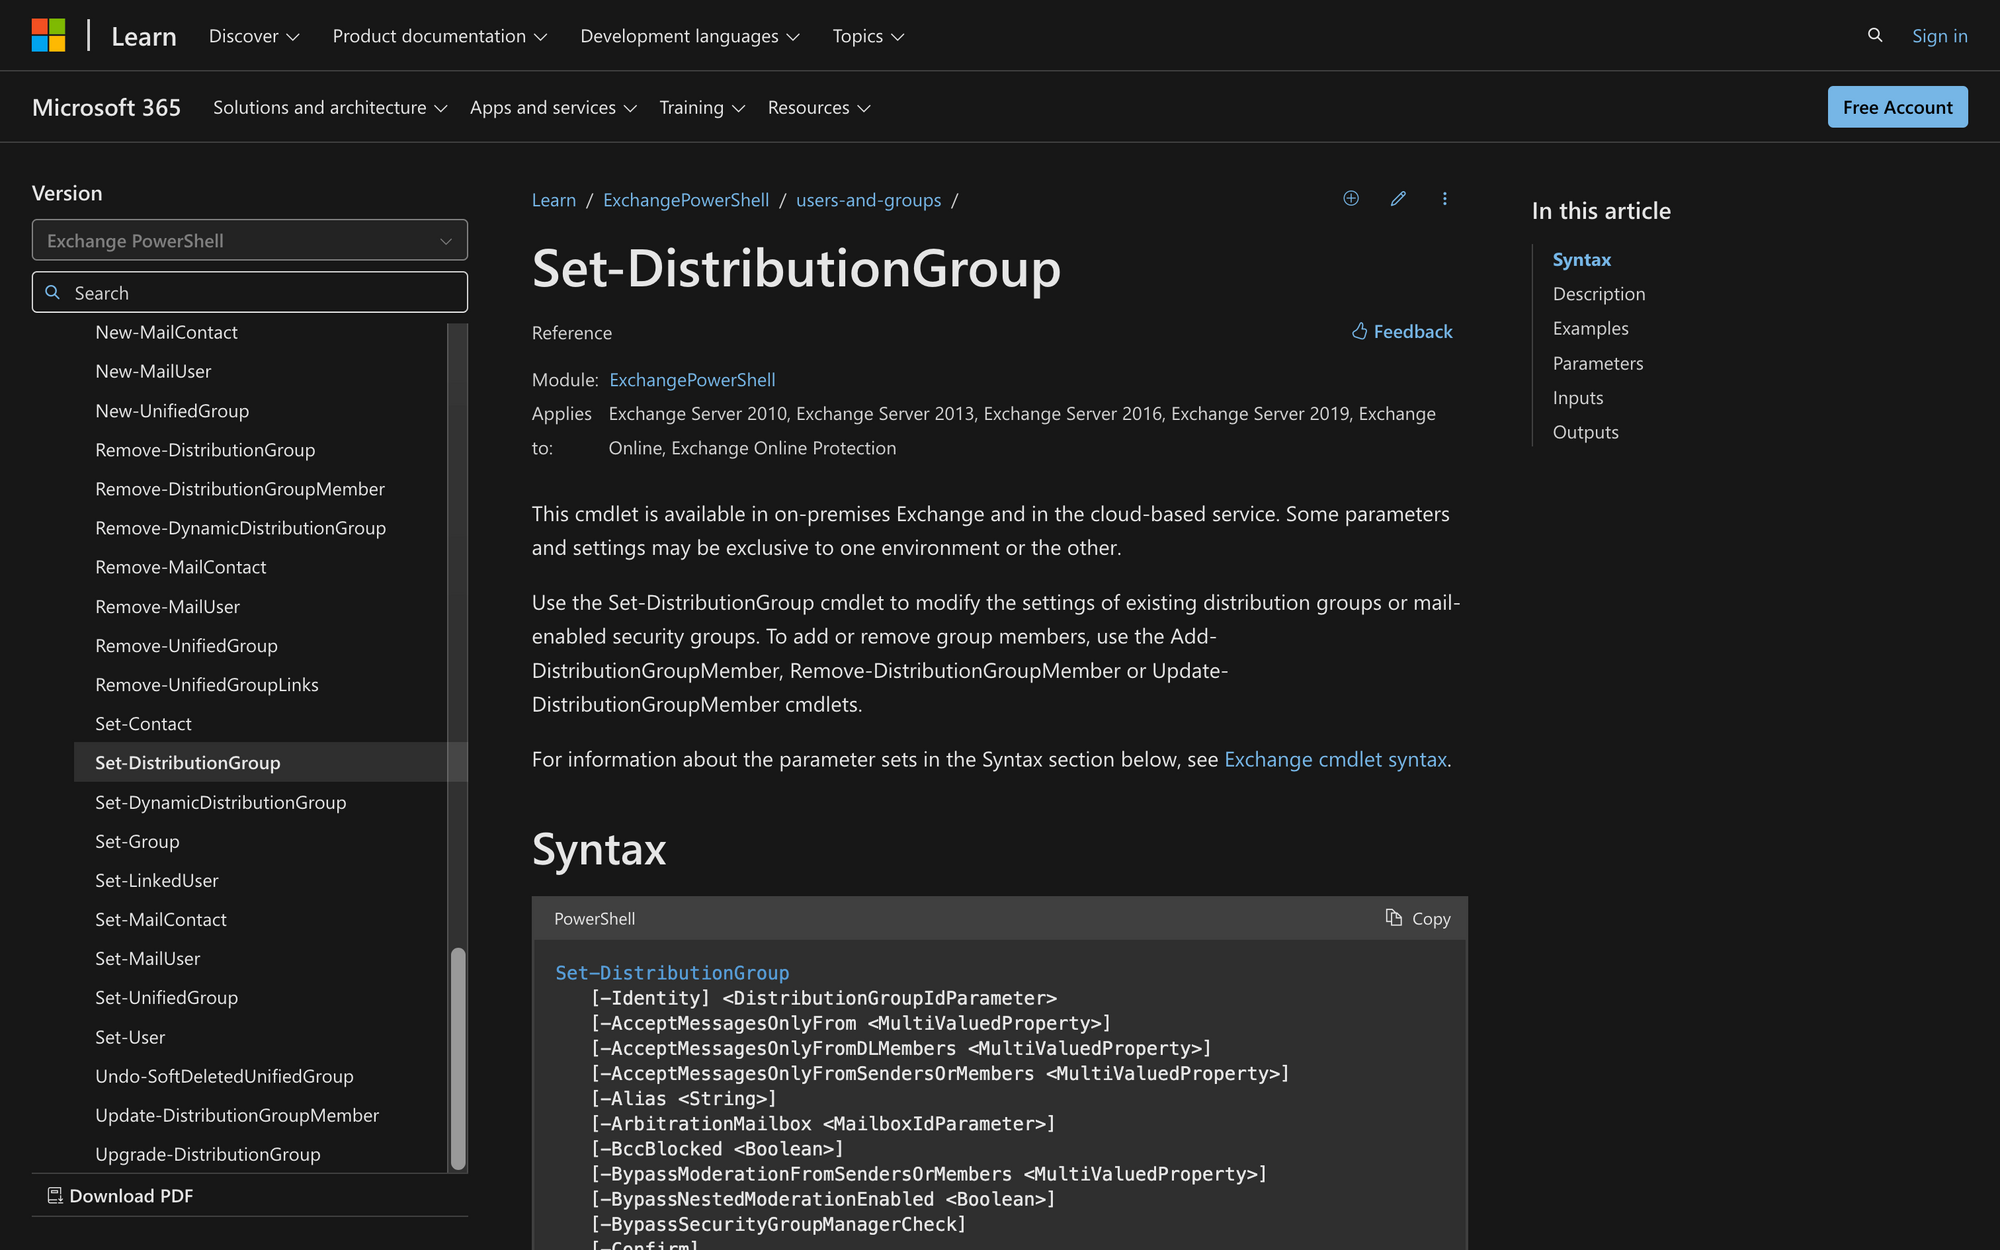
Here's the syntax of Set-DistributionGroup. If you want to learn more about the meaning of each parameter, go to the official Microsoft website:
What Can You Use the Set-DistributionGroup Cmdlet For?
There are several scenarios where the Set-DistributionGroup command can be particularly useful, such as:
- Changing Group Name and Description: Organizations often need to update the name and description of a distribution group to reflect structural or functional changes within the organization. For instance, if a company's marketing team merges with the sales team, the distribution group originally named "MarketingTeam" might need to be renamed to "SalesAndMarketing" to represent the new combined team.
- Modifying Membership Approval Settings: Distribution groups often require controlled membership to ensure that only relevant individuals are members. By modifying membership approval settings, an administrator can enforce rules such as requiring approval from a designated owner or moderator before new members can join.
- Setting Message Delivery Restrictions: To prevent spam or irrelevant communications, administrators can set restrictions on who is allowed to send emails to a distribution group. This ensures that every group is used appropriately and that members only receive pertinent information, enhancing the efficiency of internal communications.
3 Prerequisites to Run Set-DistributionGroup
To run the Set-DistributionGroup cmdlet, you need to comply with these prerequisites:
- Permissions Assignment: First, you need to be assigned the necessary permissions within your organization to execute the cmdlet. Permissions are role-based in Exchange environments, so ensure your role includes the required permissions. Keep in mind that you might need to have an administrative role, depending on your organization's management.
- Access to Parameters: Depending on your assigned permissions, you may or may not have access to certain parameters of the cmdlet. Verify that your role includes access to all the parameters you need to use.
- Exchange Environment: The cmdlet is specific to Exchange Server and Exchange Online. Ensure you are operating within one of these environments.
How to Use Set-DistributionGroup in PowerShell
We'll use Set-DistributionGroup in PowerShell by following these three steps.
Step 1: Connecting to Exchange PowerShell
Before you can use the Set-DistributionGroup cmdlet, you need to establish a connection to your Exchange environment. To do this, ensure that you have installed the correct module, and then run the following command:
You will be prompted to enter your credentials. After successful authentication, you’ll be connected to your Exchange Online environment, and we can start using the cmdlet.
Step 2: Run the Set-DistributionGroup Command
Once connected to the Exchange environment, you can modify the properties of an existing distribution group using the Set-DistributionGroup cmdlet. In this case, you’ll need to specify the identity of the distribution group and the properties you wish to change.
If you need to know the name, alias, or email address of the distribution group you want to modify, you can do so by running the Get-DistributionGroup command like this:
This command retrieves information about distribution groups in Microsoft Exchange. Once you have the information you need, you can use Set-DistributionGroup to change various properties, as shown in this example:
This command simply changes the display name of the distribution group named "Marketing" to "Web Marketing."
Here’s another example:
This cmdlet configures the distribution group named "Marketing and Web Design" as a room list, which organizes and lists rooms or meeting spaces in Exchange.
Step 3: Managing Group Membership and Additional Configuration
After modifying the basic properties of your distribution group, you might need to manage its membership or perform additional configurations to ensure it meets your organization’s needs.
There are several cmdlets that can help you make further changes to the groups, such as:
- Add-DistributionGroupMember: The Add-DistributionGroupMember cmdlet adds specified users to a distribution group, expanding the group’s membership.
- Remove-DistributionGroupMember: Remove-DistributionGroupMember removes specified users from a distribution group, reducing the group’s membership.
You can further configure the distribution group to fit specific needs, but this depends on your goals and objectives.
Wrapping Up: Using Set-DistributionGroup in PowerShell
Mastering the Set-DistributionGroup cmdlet is crucial for Exchange administrators to manage distribution groups effectively. Overall, the command is simple to use—there are three fundamental things you should remember before executing this command in PowerShell and Exchange environments:
- Cmdlet Overview: The Set-DistributionGroup cmdlet is used to modify various properties of distribution groups, including names, descriptions, and membership settings. Make sure to check the parameters of the command to learn how to modify the groups according to your needs.
- Practical Uses: Administrators can utilize this cmdlet to update group details, set approval requirements for new members, and restrict message delivery to enhance security and organization.
- Troubleshooting Tips: If the cmdlet doesn’t work or you encounter an error message, ensure you have sufficient permissions, verify your connection to the Exchange environment, and check for any syntax errors or parameter issues.

