Using New-MailboxDatabase in Powershell: All You Need To Know

Creating a new mailbox database in Microsoft Exchange is a crucial and common task for managing storage and organizing user mailboxes in an on-premises Exchange environment.
If you need to do this, the New-MailboxDatabase cmdlet provides the flexibility to define custom database names, specify file paths, and configure settings tailored to your organization's needs.
Let’s walk through the essential steps to plan, create and verify a mailbox database using New-MailboxDatabase in PowerShell.
What Is the New-MailboxDatabase Cmdlet in PowerShell?
The New-MailboxDatabase cmdlet in Exchange Server PowerShell creates a new mailbox database or recovery database on an on-premises Exchange server.
The command allows you to specify the server, database file path, log file location, and other configurations, such as whether the database is excluded from provisioning or designated as a recovery database.
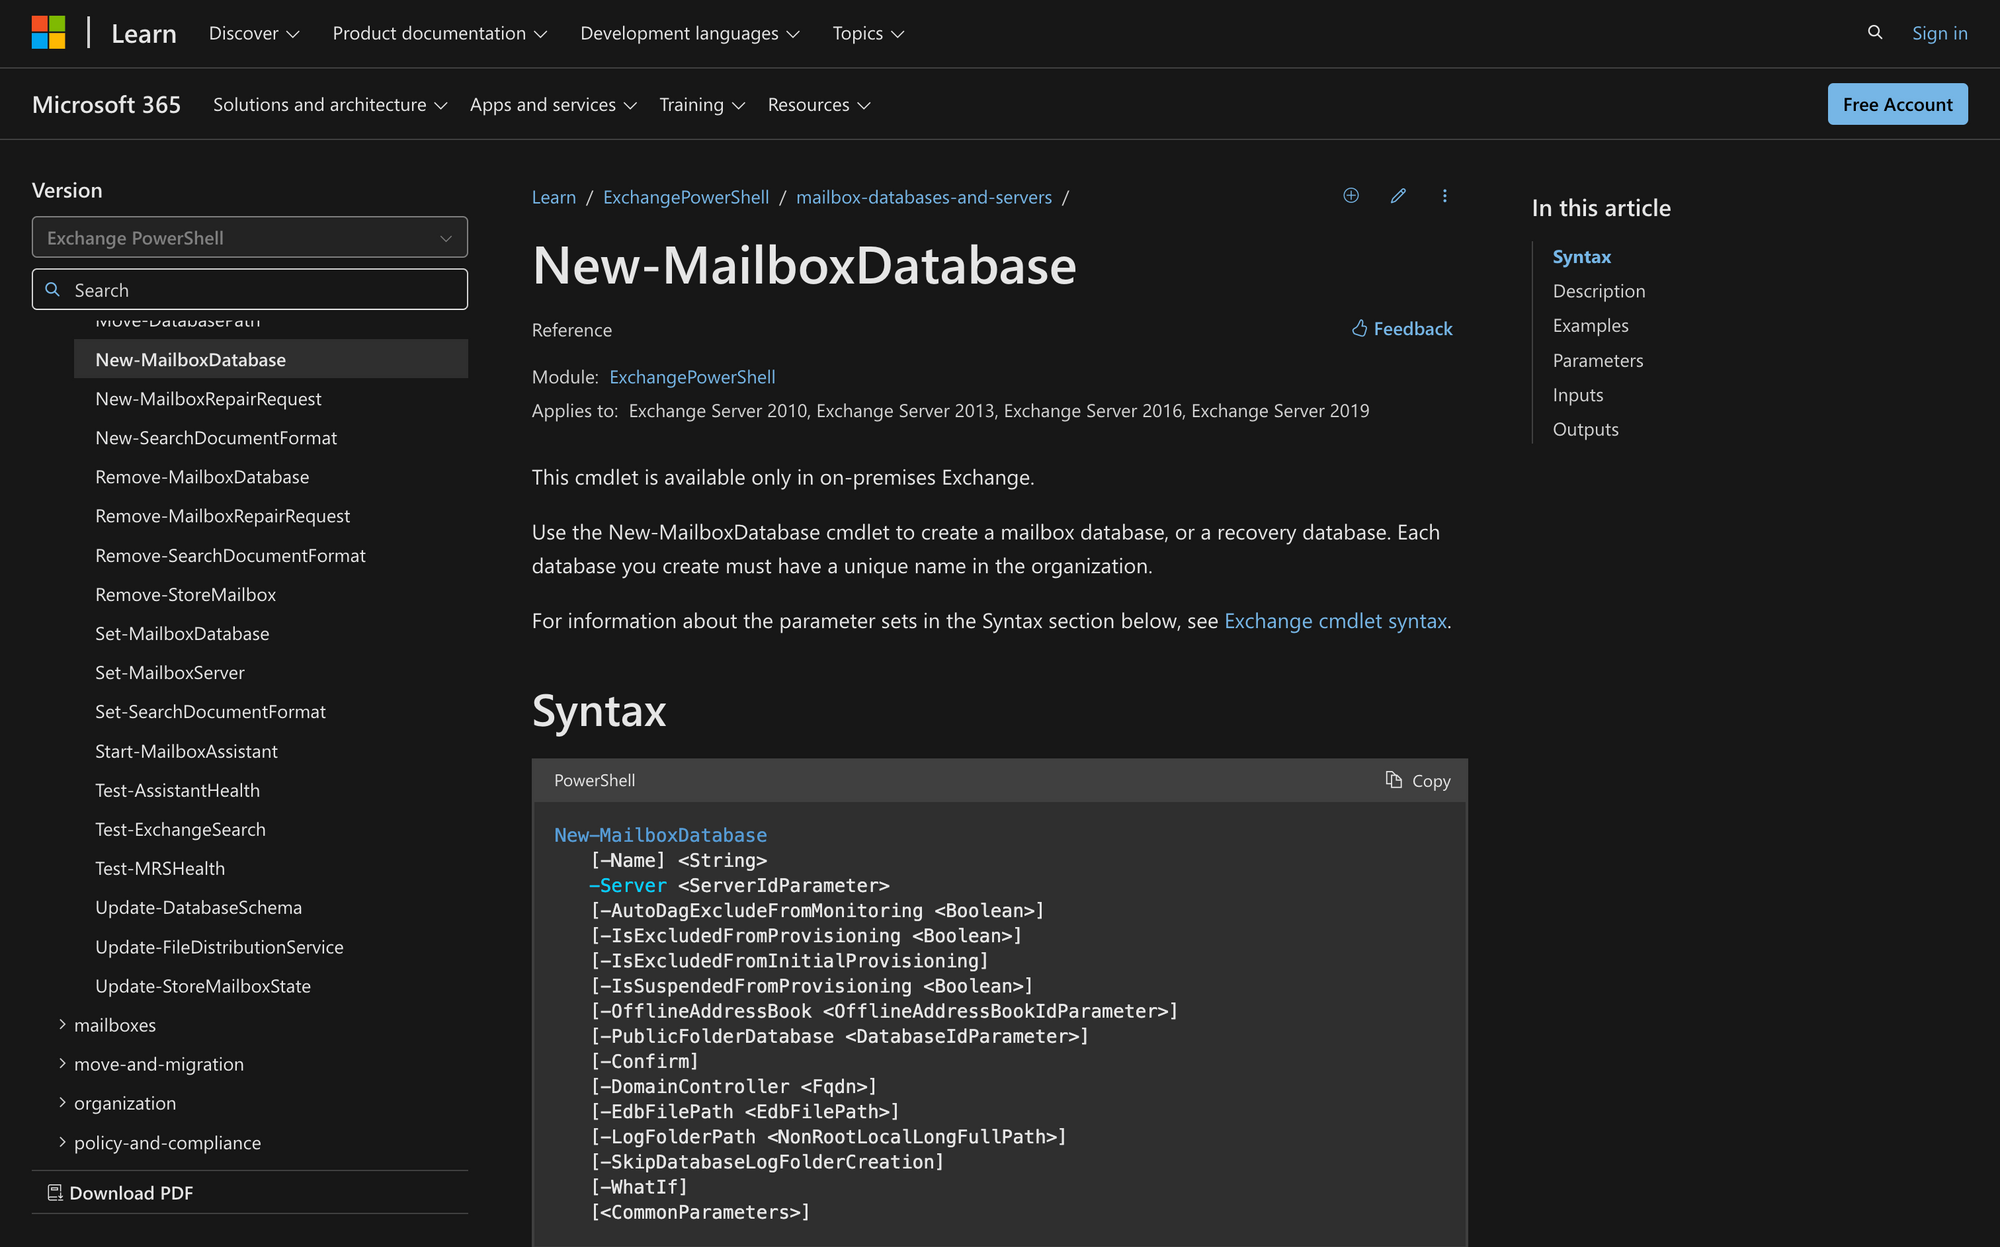
Here’s the syntax of New-MailboxDatabase, including a brief explanation of each parameter:
- -Name: The name of the new mailbox database (must be unique).
- -Server: Specifies the Exchange server where the database will be created.
- -AutoDagExcludeFromMonitoring: Prevents the database from being monitored by Automatic Database Availability Group (DAG) health checks.
- -IsExcludedFromProvisioning: Excludes the database from mailbox provisioning by default.
- -IsExcludedFromInitialProvisioning: Temporarily excludes the database from initial provisioning for new mailboxes.
- -IsSuspendedFromProvisioning: Temporarily suspends the database from being used in provisioning decisions.
- -OfflineAddressBook: Associates the database with a specific Offline Address Book.
- -PublicFolderDatabase: Links the database to a specific public folder database.
- -Confirm: Displays a prompt before executing the cmdlet.
- -DomainController: Specifies the domain controller to use for Active Directory operations.
- -EdbFilePath: Sets the path for the database file (.edb).
- -LogFolderPath: Defines the folder path for transaction log files.
- -SkipDatabaseLogFolderCreation: Skips creating the log folder (used internally by Microsoft).
- -WhatIf: Simulates the cmdlet without making changes.
- Common Parameters: Includes standard cmdlet parameters like -Verbose or -ErrorAction.
What Can You Use the Cmdlet New-MailboxDatabase For?
You can use the New-MailboxDatabase for a lot of things, including these:
- Creating a New Mailbox Database: Use the cmdlet to set up a new mailbox database on an Exchange server, specifying details like the database name, file location and associated server. This step is essential for managing user mailboxes and expanding storage capacity.
- Setting Up a Recovery Database: We can also use the -Recovery switch to create a recovery database, which is used to restore and access mailbox data from backups without affecting the active environment.
- Customizing Provisioning and Monitoring: Additionally, you can use parameters like -IsExcludedFromProvisioning or -AutoDagExcludeFromMonitoring to control whether the new database is included in load balancing for new mailboxes or monitored by Exchange's automated systems.
Prerequisites to Run New-MailboxDatabase Successfully
To use the New-MailboxDatabase cmdlet, ensure the following prerequisites are met:
- Permissions: As always, you need the appropriate permissions assigned in Exchange to create mailbox databases. The specific permissions required depend on your organization's configuration and are typically associated with roles like "Exchange Organization Management."
- On-Premises Exchange Environment: According to Microsoft, this cmdlet is only available in on-premises Exchange Server environments and applies to Exchange Server versions 2010, 2013, 2016, and 2019.
- Access to the Target Server: You must ensure that the server specified in the -Server parameter is operational and accessible. The server must already have Exchange installed and configured.
- Storage Locations: You need to identify valid paths for the database files (-EdbFilePath) and log files (-LogFolderPath) if they are not to be stored in their default locations.
- Unique Database Name: The database name provided with the -Name parameter needs to be unique within the Exchange organization (this is really important).
How to Use New-MailboxDatabase in 4 Steps
Now, let’s go over the steps to use New-MailboxDatabase in PowerShell. First, remember to establish a connection to Exchange Online using the Connect-ExchangeOnline command. Once you do this, proceed to the first step.
Step 1: Ensure Permissions and Environment Setup
Before running the New-MailboxDatabase cmdlet, confirm that you have the necessary permissions in Exchange. As I mentioned before, without the proper permissions, the cmdlet will not execute successfully.
Next, verify that the target server is running and properly configured in your organization, then proceed to the second step.
Step 2: Decide Database and Log Locations
Plan the configuration of the new mailbox database, including its name, the server it will reside on and the paths for the database and log files.
Again, the database name must be unique across your organization. For this example, we’ll create a database named MeetingDB1 on the server EXCH-SRV1.
Step 3: Run the New-MailboxDatabase Cmdlet to Create the Database
Now, execute the New-MailboxDatabase cmdlet to create the database. Use the -Name parameter to specify the name of the database, -Server to indicate the target server, and -EdbFilePath and -LogFolderPath to define file locations.
Here's an example:
This command creates the database on the specified server with the provided paths. Exchange will register the database in Active Directory during this process.
Step 4: Verify and Assign Database to Mailboxes
After creating the database, verify its details to ensure it was successfully configured. Use the Get-MailboxDatabase command to retrieve the database’s properties like this:
Once confirmed, you can assign user mailboxes to this new database. For example, to move James Smith’s mailbox to MeetingDB1, run this command:
This updates the database assignment for their mailboxes, ensuring they are now hosted on the newly created MeetingDB1.
By following these steps, you can efficiently create and configure a new mailbox database in Exchange, ensuring it is ready for production and assigned to user mailboxes correctly.
This process helps maintain a well-organized and scalable Exchange environment for everyone in your organization!

