Using Get-MessageTraceDetail in Powershell

When an email doesn’t reach its destination, simply knowing whether it was delivered or failed isn’t always enough—you need to understand why it happened. That’s where Get-MessageTraceDetail comes in.
Whether you’re troubleshooting delivery issues, investigating security concerns, or ensuring compliance, Get-MessageTraceDetail provides a detailed view of each event that affected the message, including spam filtering, forwarding rules, and delivery attempts.
In this guide, we’ll dive into how to use this cmdlet effectively to get the insights you need.
What is Get-MessageTraceDetail in PowerShell?
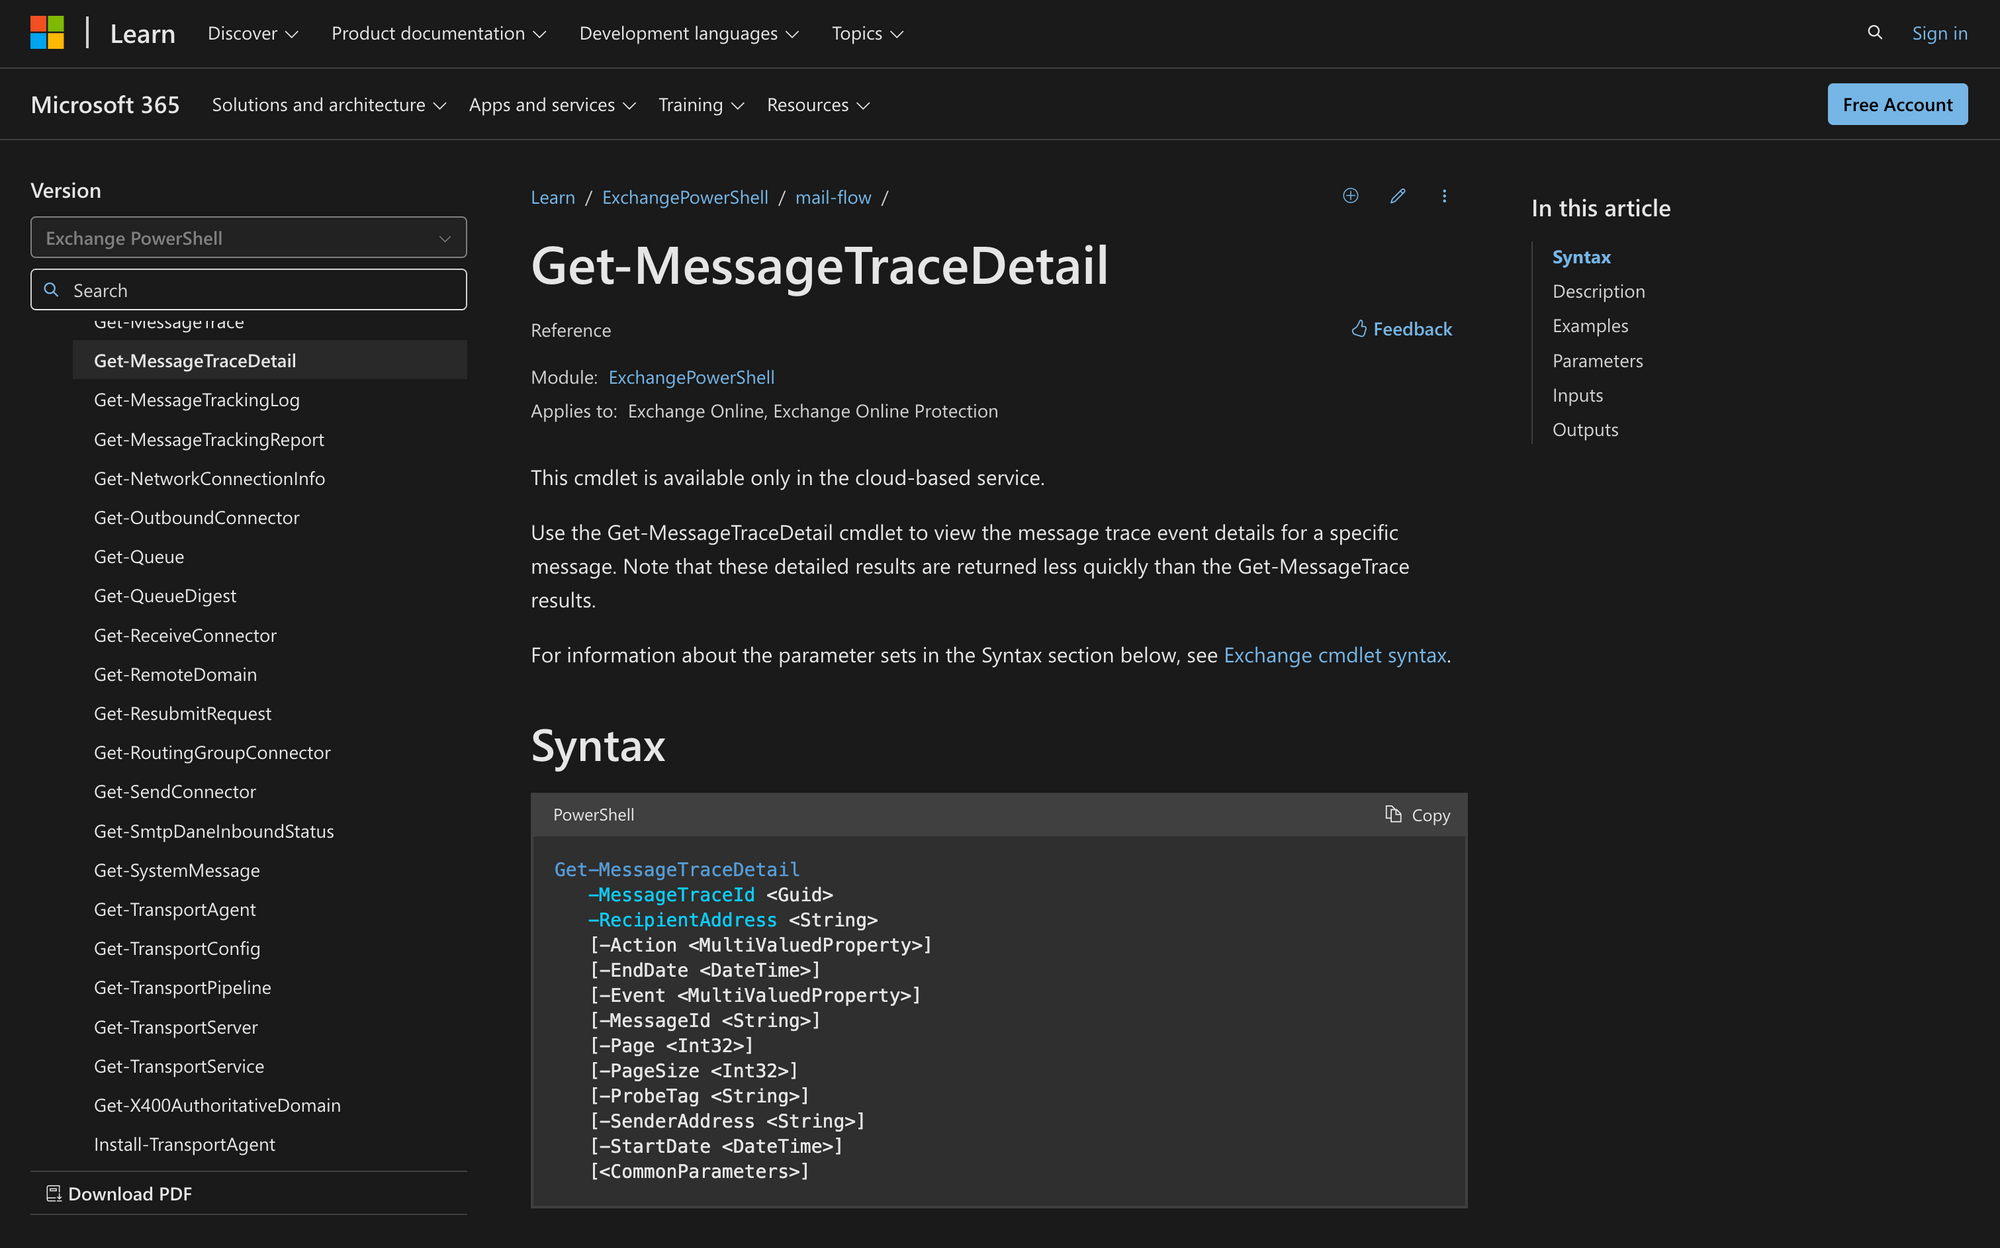
Get-MessageTraceDetail is a PowerShell cmdlet used in Exchange Online to dig into the details of an email’s journey through Microsoft’s mail system. If you already have a MessageTraceId from Get-MessageTrace, this cmdlet gives you a breakdown of every event the message went through—when it was received, sent, delivered, deferred or failed.
Keep in mind that this command only works for messages from the last 10 days. For older messages, you’ll need to run a historical search instead.
Here’s the syntax of Get-MessageTraceDetail:
Get-MessageTraceDetail vs. Get-MessageTrace: Key Differences
The key difference between Get-MessageTrace and Get-MessageTraceDetail lies in the depth of information they provide.
Get-MessageTrace is used to retrieve high-level message tracking data, showing basic details such as sender, recipient, subject, and delivery status within a 10-day window.
In contrast, Get-MessageTraceDetail is used to drill down into a specific message trace and retrieve event-level details, including each processing step the message went through (e.g., filtering, forwarding, delivery attempts).
Here’s a quick table that explains these differences:
What Can You Use Get-MessageTraceDetail For?
When emails don’t arrive as expected, Get-MessageTraceDetail in Exchange Online is the best cmdlet for investigating what happened. Here are three key ways it can help:
- Troubleshooting Email Delivery Issues: If a user claims they never received an email, this cmdlet lets you track its exact path. You’ll see if it was delivered, bounced, or stuck somewhere in the system.
- Investigating Security and Filtering Actions: Want to know if an email was blocked by a spam filter or flagged by a transport rule? Get-MessageTraceDetail reveals every action taken on the message, helping you fine-tune policies and improve mail flow.
- Tracking Message Flow for Compliance: This cmdlet provides a full event log, showing when the message hit Microsoft's servers, where it was routed, and when it reached its final destination. Perfect for audits and compliance checks.
Prerequisites for Running Get-MessageTraceDetail Command in PowerShell
Before you can use Get-MessageTraceDetail in Exchange Online, there are a few key requirements you need to meet. Here’s what you need to have in place:
- Exchange Online Environment: This cmdlet is only available in Exchange Online and Exchange Online Protection. If you're running an on-prem Exchange server, you won’t have access to it.
- Required Permissions: You need the right admin permissions to run this cmdlet. Typically, this means being assigned roles like View-Only Recipients or Message Tracking. If you don’t have access, you’ll need an Exchange admin to grant it.
- Message Trace ID and Recipient Address: At minimum, you must provide a valid MessageTraceId (a unique identifier for a tracked message) and a RecipientAddress. Without these, the cmdlet won’t return any results.
How to Use Get-MessageTraceDetail to Track an Email in PowerShell
If you need to dig deep into what happened to an email in Exchange Online, Get-MessageTraceDetail is the tool for the job—let’s learn how to use it!
Step 1: Connect to Exchange Online PowerShell
Before running any Exchange Online cmdlet, you need to connect to the service. Open PowerShell on your computer and run the following command:
Replace [email protected] with your actual admin account. You’ll be prompted to enter your credentials and log in to continue.
Step 2: Find the MessageTraceId by Running Get-MessageTrace
The Get-MessageTraceDetail cmdlet requires a MessageTraceId, which is a unique identifier for the message you’re investigating. To get this ID, first run Get-MessageTrace like this:
Replace the email addresses and dates as needed. This command will return a list of emails that match your search.
Look for the MessageTraceId in the results—it’s a long GUID (something like 2bbad36a-a467-4c7b-a82f-4b307fff549f).
Step 3: Run Get-MessageTraceDetail to Retrieve Message Events
Now that you have the MessageTraceId, run Get-MessageTraceDetail to check what happened to the email:
This will return a detailed breakdown of every event the message went through—whether it was received, deferred, failed, delivered, or filtered by security policies. If you want to narrow down the results, you can add filters like event type:
This will show only delivery events, making it easier to confirm if and when the email was received.
Step 4: Interpret the Results and Take Action
Once you have the event details, look at the Event column to understand what happened. Here’s what some common statuses mean:
- RECEIVE: The message was accepted by Exchange Online.
- SEND: The message was sent out from Exchange Online.
- DELIVER: The message successfully reached the recipient’s mailbox.
- DEFER: The message was delayed (could be due to recipient server issues).
- FAIL: The message failed to be delivered (check for errors or filtering rules).
If the email was filtered or rejected, you may need to adjust spam filtering policies, transport rules, or check if the recipient’s mailbox is full. If it was deferred, you can retry sending it or investigate potential delays on the receiving end.
Whether you’re resolving delivery failures, tracking security actions, or ensuring compliance, this cmdlet gives you a clear, event-by-event breakdown of an email’s path. With the right parameters and a solid understanding of the output, you’ll have everything you need to troubleshoot and manage mail flow effectively.